CAS


CAS - Collaboration Task

The collaborative task begun and I cooperate with Andreas Wiig Abrahamsen. The task was to find a project that we could collaborate most on. Without that one of us were left without work and waiting for the other for much of the time. The task is to plan, create parts, assembly, animation, documentation, logging of hours, evaluation and reporting. We have two weeks a total of 150 man hours to carry out the task.


Day 1

After considering several possible tasks we agreed to make a Lego model called Sunset Speeder, 3 cars that can be built out of the same pieces.
 This task will be done using Inventor for creating parts and assemblies, 3DsMax for creating animations, and Windows Movie Maker for creating movie presentation.
While Andreas is working on project plan I started to download required additional software:

Lego Digital Design (LDD) can be downloaded here
LDraw set of programs, can be downloaded here

The goal is to  have parts that we could measure and model in Inventor. To do that I needed to:
  • open LDD and find part
  • export part into .ldr file
  • open .ldr file with LDView program
  • export to .stl file
  • import .stl file into 3Ds Max
  • enlarge 10 times
  • export to .sat file
Then file is ready to be imported and measured in Inventor.


LDD

LDView

MLCad


We divided parts so we know who does which


Green: Andreas
Red: me

Each file takes time to be created. It's not easy to find all parts, but today I managed to create 4 files ready for Andreas, so he wouldn't have to wait.


Day 2  and Day 3

Lot of work, not much to show.
I'm done with all the .sat files. It took longer than expected because not all brick could be found in LDD, and some that I did found I could not export. So I opened MLCad program that was installed with LDraw set of programs. From there export as .ldr, and follow procedure above.


Andreas mark which parts are the same (only different colors)


Day 4

I finally created my part of bricks


Day 5

The last part was kind of tricky. No matter what I did I could not export the file. So I just use screenshots from LDD. I had main dimensions from LDD.


I also did first assembly today, and chose materials for each part. Time for truck


Day 6

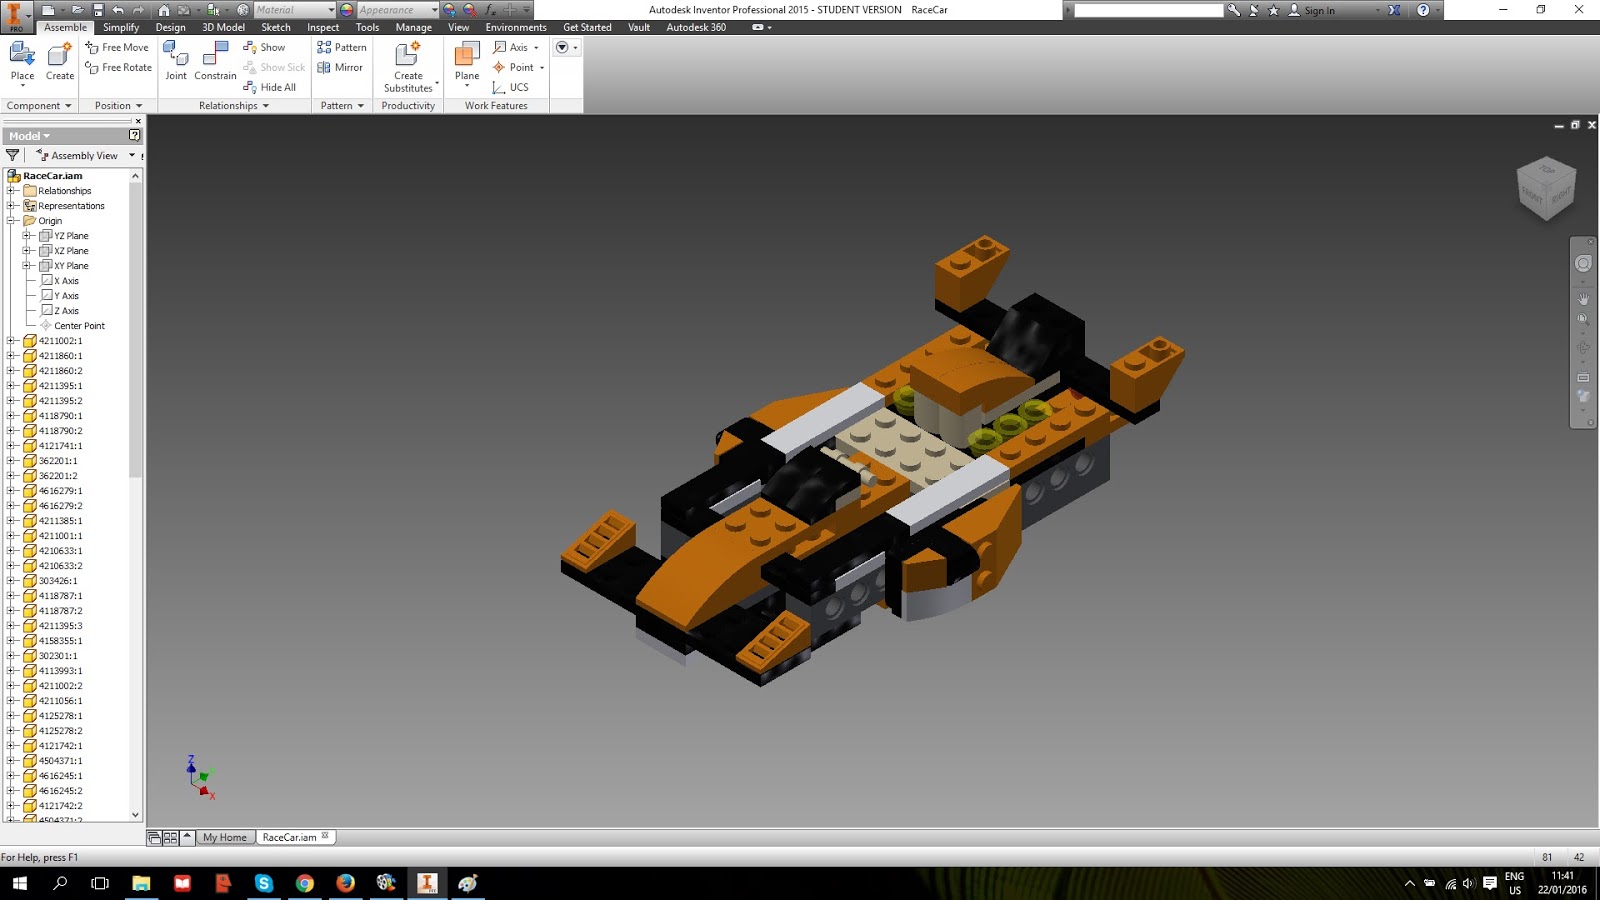
Today I made the Race Car assembly


Day 7

Today I started to work in 3Ds Max. We decided that I will make all of the animations, and Andreas will render them.
Large part of the day past when was setting up camera and lights in the scene.
I finally managed to make truck animation, and it's ready to render. 15 seconds animation with 15 fps, which gives 225 frames.


Day 8

As it turned out the animation wasn't ready to render. Adreas did test render of one frame and it turned out we have to change materials. The materials looked good in Inventor but not in 3D Max. So when I started to work on another animation he took care if all materials.
At the end of the day Sunset Speeder animation was ready.


Day 9

Today I finished the last animation of all. The Race Car is ready. Andreas took care of rendering and the only thing that is left to do is to finish th repport and making the video presentation of our work.


 I created also file where stood all three models, so we could do presentation photo, res 2400x1300.


Day 10

Today I created our presentation video. Had some problems with Windows Movie Maker at first, but after reset (first the program, then computer) it start to cooperate.


And this is our final movie presentation


The only thing left to do is to write our final report. At first it was Andreas' task, but now we are working on it together.

CAAm2

I denne modulen har vi jobbet med Revit ingjen. Vi skulle bruke huset vi tegnet i forrige modulen (CAAm1) og sett opp section views, elevation views og 3D views. Vi skulle lage også Sheets med plantegninger, fasade tegninger, detail tegninger, schedules og renderbilder som publiseres til en DWF fil.

 In this modul we worked in Revit again. We used house that we created in previous modul (CAAm1) and the task was to create sections, elevation and 3D views, as well as sheets with plans, facades, details, schedules and render pictures that we would later publish to DWF.

Da begynte jeg med i denne oppgaven var å rette opp i noen feil jeg hadde på modellen min som jeg fikk fra tilbakemelding fra min forrige innlevering. Neste lagte jeg romplaner for begge etasjene.

 I started this task by making corrections to mistakes that was pointed out to me in feedback from previous assignment. Then I made room plans for both floors.


Målsetting begge etasjene tok mye tid. Det var ikke enkelt men med å lese i byggtegningsboka jeg klarte det.

Dimensioning of both floors took me a long time, but after reading about it in construction drawing book (Magnussen, Rolf-Erik, Byggetegning) I finally did it.


Neste steg var å lage sheet med fasader. Jeg bare hadde skjule terreng og trær.

The next step was to make sheet with facades. I just had to hide terrain and trees in the views.


Sheet med snitt gjennom begge etasjene var lett å gjøre. Men for å se dette snitt i 3D jeg måtte oprette en camera og krysse av section box. Da kunne jeg lage render av dette 3D snitt.

Sheet with section view through both floors was easy to make. But to use this section in 3D view, I had to create a camera and check "section box". Then I could render the propper section view in 3D.
 

Sheet med Section og Detail View av følgende elementer: Vindu, dør, trapp og tak.

Sheet with section and detail view of following elements: window, door, stairs and roof.


 Jeg lagde ogsa sheet med dør og vinduer schedule.

I made a sheet with door and window schedule also.


Og rendered 3D viewer

And rendered 3D views


Som vi kan se min plan var ikke bra nok. Jeg trodde at alt vil ta meg mye mindre tid enn det gjorde. Mye av tiden som gikk tapt var fordi jeg måtte finne ut mine egne feil og korrigere dem. Jeg er sikker på at neste gang jeg vil være i stand til å fungere bedre.

Det var virkelig tilfredsstillende oppgave.


As you can see in the graph, my plan wasn't good enough. Pretty much everything took more time than I thought it would. I had to figure out the mistakes that I made previously and correct them. I'm happy however, because correcting ones mistakes makes for the best learning. I'm sure next time, I will be able to do abetter job first time arround. 

It was really satisfying task.

CAAm1

CAAm1


Da var det endelig tid for Revit!
Moduloppgaven CAAm1 er å starte på et hus som så skal gjøres ferdig i CAAm2. Første del var å begynne på huset ut fra disse arbeidstegningene.

It's finally time for Revit.
This module task was about creating a house which we will finish in CAAm2. First part was to start from this drawings.


Her er tegningene ferdig redigert i Photoshop
Here are drawings edited in Photoshop


Vi fikk også fasader visninger.
We got also facades views.


 I tillegg skulle vi lage en Site basert på kotelinjene på dette bildet:
 In addition, we should create a Site based on contour lines in this photo:


Jeg har importert første etasje plan og tegne vegger, vinduer og dører.
 I've imported ground floor drawing and draw walls, windows and doors.


For 2. etasje, valgte jeg å ikke bruke tegningen som base bilde. I stedet brukte jeg den første etasje som guide og jeg plassert 2. etasje tegning i en egen Revit fil for å ta målinger.

 For the 2nd floor, I chose not to use the drawing as a base image. Instead, I used the 1st floor as guide in Revit and I placed the 2nd floor drawing in a separate file to take measurements.


jeg gjorde taket, men selv etter mange prøvelser jeg fortsatt ikke kan koble to deler av taket på høyre side av bygningen. Jeg vet ikke hvorfor.

Then I made roof, but even after many trials I still can't join to two parts of the roof on the right side of the building. I really don't know why.


Etter å legge toposurface til mitt prosjekt og noen trær ferdige (for tiden) oppgaven ser slik ut

After adding toposurface to my project and some trees finished (for the time being) task looks like this


Etter rendret
After render


For ikke å glemme her er prosjektplanen for denne øvelsen. Det tok mye lengre tid enn planlagt. Jeg hadde mye problemer med å lese planene.
 
Not to forget here is the project plan for this exercise. It took a lot longer than planned. I had a lot of problems with reading the plans.


CAVm3

Moduloppgaven CAVm3 har gått ut på å lage en animert presentasjon av messestanden fra CADHP1, og legge til noen andre objekter vi har jobbet med i det siste. 

This modul task was about making animated presentation of  trade show stand from CADHP1 and adding some of the other object that we had work on.


Day 1

 Jeg starte denne oppgave med å rydde litt opp min messestanden. Jeg fjerne noen teksturene og objekter for å ha mer oversiktlig scene. Jeg har lagt også noen av mine tegninger som bilder i scenen og objekter jeg laget senere.

I started this task by cleaning my exhibition stad a little. I deleted some of the textures and objects so I have more clear scene. I added also some of my drawings as pictures in the scene and some of the objects I've created earlier.


 Day 2


I dag har jeg jobbet på min animasjon. Jeg måtte gjøre det to ganger, fordi den første gang, ble kameraet beveger seg hele tiden, og noen av gjenstandene måtte dukke opp rett foran kameraet, og jeg kunne ikke helt gjøre det.
Siden det var en Tv i stativet, bestemte jeg meg for å prøve ut ved hjelp av en avi film som bitmap så det ville vise under animasjonen. Jeg brukte avi som ble gjørt i tog animation.


Today I worked on my animation. I had to do it twice, because the first time, camera was moving constantly and some of the objects had to show up right in front of the camera and I couldn't quite make it work.
Since there was a Tv in the stand, I decided to try out using a avi movie as a bitmap so it would display during the animation. I used movie which was made during train animation.


Animation:


CAMm2

CAMm2

In this module I continued to work on my espresso pot from CAMm1. This task was divided to two days of work.

Day 1

Today I finished working on my espresso pot. I made every part in seperate file, I also finished parts that was started in CAMm1.


Next step was to create subassemblies and main assembly so it would look like in the dwf that we received.
This time I added screws, washers and nuts from Content Center. Every part was also fully constraint.
This is how it looks after today.


Day 2

Today I worked on mini version of my espresso pot. We got some of the new dimensions, but most of them we had to figure out ourselves.


I started by copying project folder and renamig it as Espressokanne_mini. Then I started to work on changing the parts. After making few changes I wanted to check if the "big" espresso pot hasn't change. Unfortunately it did. I don't know why it did, besause i change the project file before making any changes. So I had to rename all of the sub- and main assemblies by adding "mini" to the names.
I also turned Inventor off and on again. Don't know which helped but the most importand thing is that now it works.

My constraints was well maid (I'm so smart :D) so after problem I described earlier, assemblies weren't such a problem. This is how the mini version looks like now.


After I finished mini version I returned to big espresso pot and made an presentation and animation.


Here is how it looks when disassembled:


And here is animation:


After the animation I started to work on my drawings. First I made assembly drawing (from presentation file) with parts list, and then production drawings of each of the parts.


Then I made dwf file with all of the drawings and 3D model.


As you can see I used much more time on drawing than expected. It is still not easy for me, but I'm learning how to make them accurate as well as "quick" drawn. I used also more time on the presentation but I think it was time well spent.

All in all it was great task aand I had a lof of fun with it.